
PhiTheta is a program which performs the plotting of scalar quantities at each angle bin partition, phi / theta combination, for the selected IDFS data set. The selected IDFS data set may be a scalar instrument if the instrument is spinning and has theta regions associated with each sensor defined. The selected IDFS data set may also be a vector instrument, in which case, the data is averaged or collapsed over the charge, mass and/or scan dimension in order to compute the scalar quantity to be displayed at each phi bin / theta bin combination processed. The data is displayed in three dimensions: angle (x-axis), angle (y-axis) and intensity (z-axis). The z-axis or intensity variable can be any of the available units defined for the data source selected. The phi and theta angles can be interchanged along the x-axis and y-axis.
The PhiTheta program can be invoked in one of two modes:
(1) interactive mode or (2) batch mode. In interactive mode, the program
utilizes a GUI-based definition session to define the data source to be
presented. The definition phase of the PhiTheta program
has many options so that the user can tailor the displays to meet their
individual needs. Once the definition session has been completed, the selected
data source can then be displayed for the selected time range. To invoke
the program in interactive mode, type PhiTheta at the command line.
When the user is accessing the PhiTheta program from within
the SDDAS viewer, the program is always invoked in interactive mode.
In batch mode, the interactive GUI-based definition session is bypassed and
the data requested is immediately displayed based upon information
contained in the named layout file. To invoke the program in batch mode, type
PhiTheta -FName filename at the command line. The argument
filename is the name of the layout file that is to be
utilized during the current display session. Note that the name of the
layout file does not include the .PT extension. If the named layout file
does not exist, an error is displayed and processing terminates. In addition,
batch mode can only be used for non-interactive graphics devices, which result
in the generation of meta files that can later be printed. If the output
device selection contained in the layout file is an interactive device, an
error is displayed to the screen and processing terminates. However, the
output device that is specified in the layout file can be overridden by
specifying the device to be utilized as an argument on the command line.
For a complete list of arguments that can be utilized in batch mode, the user
is referred to the SDDAS Applications Batch Interface document.
The format that is used for plotting the data is selectable by the user, using a row and column specification. The maximum number of rows is set to ten. The maximum number of columns is set to six. For PhiTheta plots, time increases from plot to plot, starting at the top of the page, displaying data column to column before proceeding to the next row of data. The start time for the data is displayed along the top of each plot in the format hours:minutes:seconds. The year and day for the current plot is displayed in the upper-left hand corner of the page. A heading at the top center of the page is always displayed. This heading indicates the name of the satellite and the virtual instrument being processed, the selected data unit being displayed and the range over which the scan dimension is collapsed for vector instruments. In addition, a label which specifies the units being processed is displayed along the top of the color bar. This label is defaulted, but can be changed by the user.
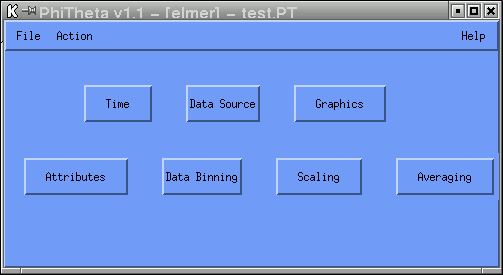
To commence the display of the PhiTheta program, a time range for which the data is to be acquired must be specified. This is achieved by selecting the "Time" button. Next, an IDFS source must be selected. This is achieved by selecting the "Data Source" button. Once a valid IDFS source has been selected, the "Attributes", "Data Binning", "Scaling" and "Averaging" buttons become visible. At this point, a plot can be displayed, since all other information is defaulted based upon information found in the PIDF file for the selected IDFS source. To plot the first page of data, select the pull-down Action menu from the main menubar and select the Draw option. Upon activation, the local database is checked to see if the requested data files are online. If data for the requested time range is not online, the PhiTheta program will ask the user if they wish to retrieve the requested data before the plotting of the data is enacted. If the user answers yes, the data will be promoted to the local disk before an attempt is made to display the data. If the user answers no, the PhiTheta program continues and tries to display the data, but an error message will be displayed since the data is not available for processing.
The plots will be displayed on the output device selected by the user. The default selection is the XWindows device. If the user is accessing the PhiTheta program from within the SDDAS viewer, the plot will be displayed in the box area defined on the grid. If the user is running the PhiTheta program from the command line, the plot will be displayed in an area designated as the output area for the window being utilized. If the output device selected is a bus hard-copy device, the plotting of the data will be done concurrently by another process, with the results being sent to a meta file.
Based upon the time range and the output device specified by the user, the PhiTheta program may generate more than one page of data. For the XWindows device, the Draw option must be utilized in order to proceed to the next page of data. A full page of data is always displayed to the user for each "Draw" activation. Data will continue to be plotted until the user-requested end time has been reached or until an error condition is raised. When an error condition is encountered, a message is displayed and processing terminates. If the user-requested end time is reached before all rows are processed for the current page, rows that exceed the end time are cleared and left blank so that data from the previous page and the current page are not mixed together.
Once all the information has been defined, the information may be saved to a layout file for future retrieval. This is achieved by selecting the pull-down File menu from the main menubar and selecting the Save As option. The information defined is not saved by the program unless the user explicitly does so. Note that when providing the name of the layout file, do not specify the .PT extension. The PhiTheta program automatically appends the .PT extension to the name of the layout file upon creation of the file.
The remainder of this document gives an in-depth explanation of the options that appear on the various GUIs utilized by the PhiTheta program.
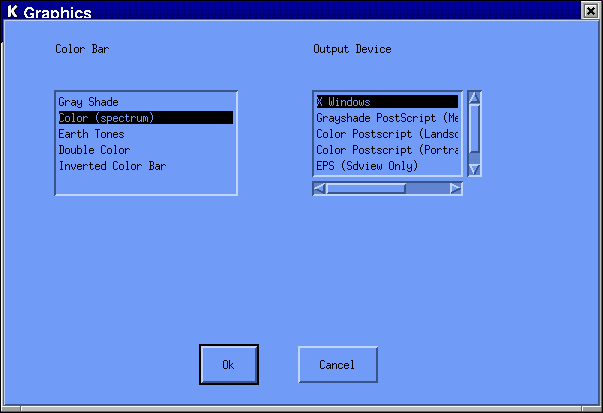
| Value | Color Table |
|---|---|
| Grayshade |  |
| Color | 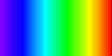 |
| Earth Tones |  |
| Double Color |  |
| Inverted Color | |
You will notice that the spectrum shown for the Color and Inverted Color options are the same. The difference between these two options deals with the background color. For the Color option, the background color is black and the foreground color is white. For the Inverted Color option, this is reversed - that is, the background color is white and the foreground color is black. This option was added for the use with the hard-copy devices; XWindows treats these two options the same, using black as the background color.
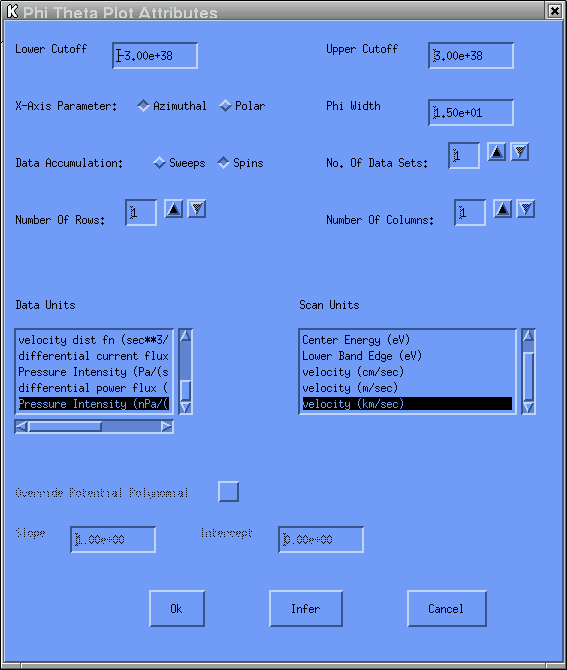
The Infer button is used to default all options based upon information found in the PIDF file for the selected IDFS data source.
If the IDFS data source selected uses spacecraft potential data in the conversion of the
values selected for the Data Units and / or the Scan Units
options, this menu option will become visible and may be changed from the default value
of "No" by the user.
Once the IDFS data source has been selected, binning information must be provided. The binning information is defaulted based upon information contained in the PIDF file for the selected data source. For the PhiTheta application, all sensors are binned using the same binning scheme; therefore, PIDF sensor zero is used to define the binning scheme that will be used by all sensors. The user need not concern themselves with this information unless a change in binning schemes is desired, which can be achieved by selecting the "Data Binning" button.
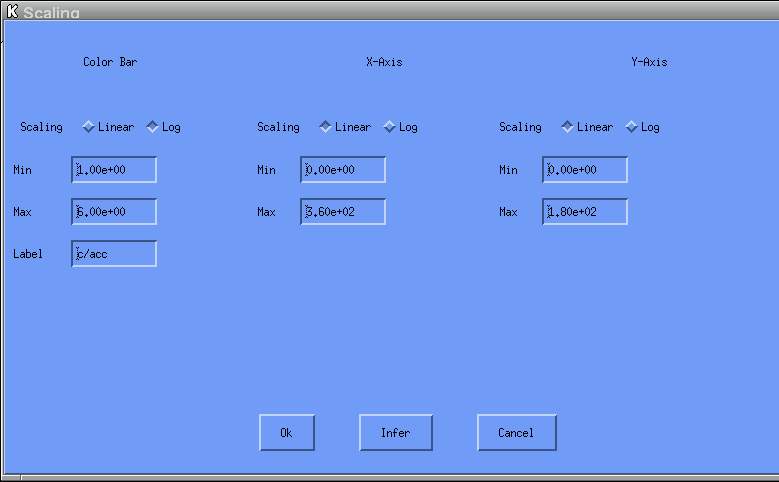
The Infer button is used to default all options based upon information found in the PIDF file for the selected IDFS data source. For color bar information, the information retrieved from the PIDF file is based upon the selected Data Unit. For the x-axis and y-axis information, the min/max range is set based upon the selection for the X-Axis Parameter option. The range for the axis against which the theta angles are to be displayed is set from 0 to 180. The range for the axis against which the phi angles are to be displayed is set from 0 to 360.
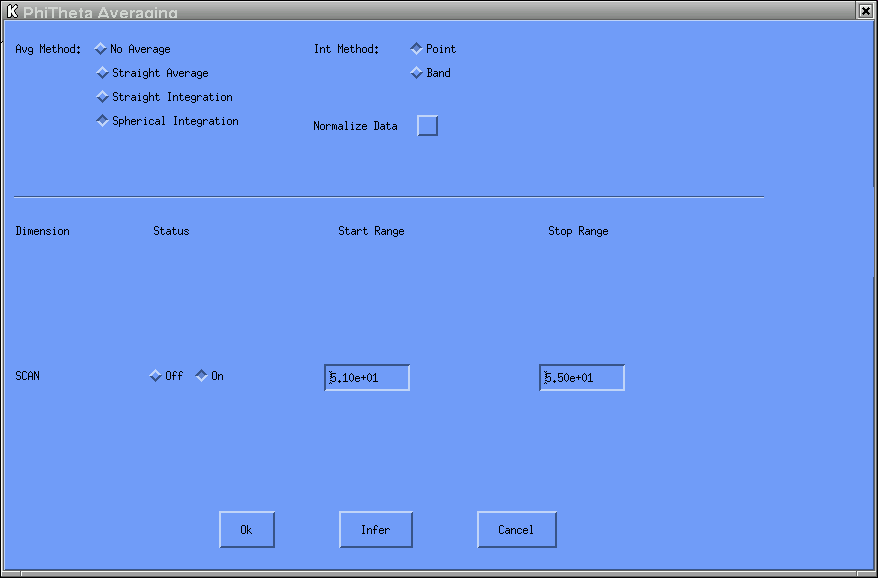
PhiTheta plots are composed of scalar values for each theta bin / phi bin combination that is processed. When a vector IDFS source is selected, the data must be reduced to a scalar quantity by collapsing over the dimensions that are applicable to the data source. These dimensions can include charge, mass and scan dimensions. The Infer button is used to default all options based upon information found in the PIDF file for the selected IDFS data source.
![[Straight Average Equation]](pics/str_avg.gif)
![[Straight Integration Equation]](pics/just_scan_str_int.gif)
where the range is defined by the volume integral and ds is the scan variable increment.
![[Spherical Integration Equation]](pics/just_scan_sph_int.gif)
where the range is defined by the spherical volume integral and ds is the scan variable increment.
If the IDFS data set depends only upon time (a scalar instrument), the option is
defaulted to No Average and at no time can the user select any of the
other options.
For a vector IDFS data source, the user cannot turn off the status flag for the
scan dimension since it must be averaged over in order to reduce the data to
a scalar value that can be plotted at each phi/theta bin pair.
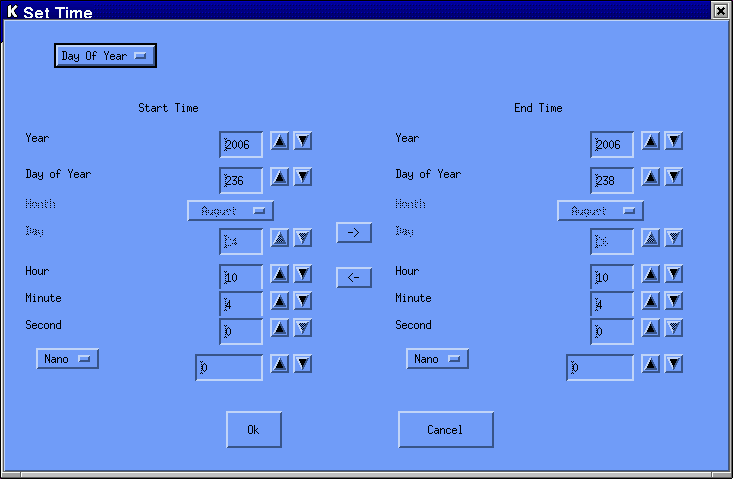
In order to set the time values, enter the values in the boxes that appear next to the time component being set or use the sliders. The stop time must be greater than the start time. The time is initially set to the current time. By Julian convention, January 1 is day 1.
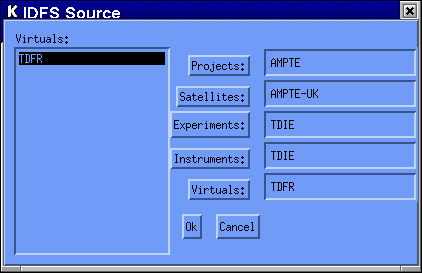
The user must select a project, satellite, experiment, instrument and virtual instrument from which data is to be acquired and displayed in the PhiTheta graphics presentation. To change any of the selected options, click on the buttons on the right hand side. Note that all lineage information under the branch being changed is no longer applicable and must be re-selected. When the IDFS data source is changed, all GUI options are reset based upon information in the PIDF file for the newly selected source.
This option is not presented when the user is accessing the PhiTheta program from within the SDDAS viewer. The viewer has its own File Button option which should be utilized.
Currently, this pull-down menu contains just one option
This option is not presented when the user is accessing the PhiTheta program from within the SDDAS viewer. When this program is invoked from within the viewer, the user should go to the box that contains the PhiTheta plot, click on the right mouse button and select one of the options presented or use the Action button provided by the viewer.